Last week I talked about roasting your own coffee, and trust me, you won't regret trying it. This week, I'm continuing with the coffee theme, and I'm going to show you how I make reusable coffee filters.
But first, here's a little bit about why I made our own:
1) I hate waste. I'm not afraid of washing or a little extra clean up if it eliminates waste. Less trash makes me very happy.
2) I'm cheap or frugal, if cheap offends you. This cuts out another thing we have to purchase. Instead of new filters every time, just pull out a reusable one.
3) It's easy. Like I mentioned before, I don't mind a little extra work, but when it's this easy- it's a no brainer.
Now back to the filters. We have two ways we brew coffee at our house and when you read these, I might remind you that we are coffee snobs.
The first is our French press. Hands down, best coffee if you use it correctly. Coffee needs two things to be extracted properly- 1) heat and 2) time or pressure (that's why espressos brew so quickly, pressure). I might add that this is one of the reasons I'm not a fan of the Keurig systems, not enough time or pressure (no offense if you love yours, it's not for me though).
So as long as your water is 198-204 degrees F and is in contact with the grounds for approximate amount of time (this depends on methods and grind- check it out here) than you'll have optimal extraction. For the French press that's easy, just get your water close to boiling and pour over (go with courser grounds so the filter catches them all, and you don't over extract- over extraction = bitter). At the designated time, push down slowly the metal filter and enjoy.
The second way we brew is a drip cup. Now my hubby thinks this is the better way to brew. The cup is conical shape (which provides better drainage = no sludge & better extraction) and drips the hot water directly into a single serving cup. With a good filter and good brewer it has the proper time for extraction. I must admit, I like it too and the hubby is a master at brewing...so I may have to give him this one.
But the problem with the drip cup? Filters! So to stop the waste and expense, enter make your own.
First you'll want a paper filter for a pattern. I used a number 2 filter. If you have a conical basket for a larger machine, you'll probably need a number 4. I added one inch seam allowances for each side.
Make your pattern and cut. For fabric, I used unbleached muslin. This is IMPORTANT. You definitely don't want to ingest any bleach or taste it- Yech.
I wanted a raw look up top, but also didn't want my fabric to rip or shred over time. So I did an overlock stitch on the top.
I then sewed all three sides together (1/2 inch seam allowances).
Trim the edges to remove excess fabric and then flip inside out. Press. Sew three sides again (1/2 inch seam allowances).
You've just added French seams! Yay. The great thing about this, is it exactly mimics the paper filter, in that you have a thicker bottom portion to fold down over your drip hole. This slows the water down (remember time for extraction) and doesn't expose your coffee to raw seams.
But remember our raw top? I make it taller to fold over the cup. I hate when a paper filter gets caught by the water and folds over. With it rounded over the top, no problem!
A simple and easy way to eliminate some waste. Plus remember that easy part- it's not only easy to construct, but simply rinse out when done and allow to air dry. No need to wash with soap- besides who wants soap flavored coffee?? If you do worry about germs, don't, just boil it and use again.
All in all very worth your time.
This post is linked to Frugally Days Sustainable Ways # 18.
Showing posts with label crafting. Show all posts
Tuesday, March 13, 2012
Tuesday, February 14, 2012
Worthwhile Wednesday- Wool Dryer Balls
Looking for another way to save and reduce your waste?
I'm trying wool dryer balls and getting rid of my dryer sheets!
Dryer balls work by separating your clothes as they circulate in the dryer which allows the warm air to reach more of your clothing, reducing dryer times. In addition to this, the slightly rough, felted outside of the balls creates friction against the fabrics, which cuts down on static and softens your clothes.
Now I already use white vinegar for a fabric softer to get rid of liquid softner. 1/2 a cup in your rinse dispenser will soften your clothes, remove stains, and kill germs!! However, who doesn't want extra softness and less energy use that wool dryer balls provide?
My dryer balls are made from 100% natural wool yarn, do not use a wool blend!! It will not felt.
I wrapped a solid wool ball and then crocheted a case around it. The addition of the crocheted cover does not allow unraveling within your dryer, while you are drying your clothes. (some versions do, based on the amount your wool felts) I used a simple crochet ball pattern that was for a hacky sack and just expanded it to make it larger.
After construction I felted them, which is really simple to do. In order to felt, simply run a load of whites and drop your dryer balls into the wash. The hot water helps nap the wool and then toss them in the dryer at the highest heat to cause even more felting. I only felted mine once, but you could do it multiple times.
My dryer balls are unscented, but the addition of fragrance can be added, check out essential oils.
These are approximately 9 inches in circumference, and most people recommend you start with anywhere between 3-8 balls, so I started with 3 balls.
So far so good, and I'm liking them for diapers this winter. Cuts down on our drying time and cost us very little to make!
This post is linked up with Frugally Sustainable Ways.
Now for shameless plug...if you aren't into finding your own wool, winding yarn, crocheting, or felting, then try my Etsy store. I've got a set of three for $12. Might sound like a lot, but considering you won't need to buy another dryer sheet...it's really savings!
Hint- Find us on Facebook, I've got some giveaways coming up and right now a discount code!
I'm trying wool dryer balls and getting rid of my dryer sheets!
Dryer balls work by separating your clothes as they circulate in the dryer which allows the warm air to reach more of your clothing, reducing dryer times. In addition to this, the slightly rough, felted outside of the balls creates friction against the fabrics, which cuts down on static and softens your clothes.
Now I already use white vinegar for a fabric softer to get rid of liquid softner. 1/2 a cup in your rinse dispenser will soften your clothes, remove stains, and kill germs!! However, who doesn't want extra softness and less energy use that wool dryer balls provide?
My dryer balls are made from 100% natural wool yarn, do not use a wool blend!! It will not felt.
I wrapped a solid wool ball and then crocheted a case around it. The addition of the crocheted cover does not allow unraveling within your dryer, while you are drying your clothes. (some versions do, based on the amount your wool felts) I used a simple crochet ball pattern that was for a hacky sack and just expanded it to make it larger.
![]() |
| Pre-felting |
![]() |
| After felting |
These are approximately 9 inches in circumference, and most people recommend you start with anywhere between 3-8 balls, so I started with 3 balls.
So far so good, and I'm liking them for diapers this winter. Cuts down on our drying time and cost us very little to make!
This post is linked up with Frugally Sustainable Ways.
Now for shameless plug...if you aren't into finding your own wool, winding yarn, crocheting, or felting, then try my Etsy store. I've got a set of three for $12. Might sound like a lot, but considering you won't need to buy another dryer sheet...it's really savings!
Hint- Find us on Facebook, I've got some giveaways coming up and right now a discount code!
Tuesday, January 24, 2012
Crafty Crow Couture
Welcome back everyone!
In case you didn't guess, I finally took the plunge and have opened my own Etsy store.
Why the sudden turn around? I have an opportunity for some free advertising, so I pushed my time table up a little bit.
I'm really excited, and I hope you all like my shop. In fact, here's a little bit more about my shop:
So since today is the grand opening, it means GIVEAWAY time! One lucky reader will be getting a $10 credit to the new shop.
Here's how it is going to work.
1) First visit my shop and then in a comment let me know what you like the best. (REQUIRED)
2) Like my shop on facebook and leave me a comment on the wall and here to let me know. (1 Entry)
3) Share my shop page in your facebook feed and tag the shop in the link. Let me know in a comment (1 Entry)
4) Share my shop on your blog and let me know about it (link in comment). (2 Entries)
Deadline is 11pm, Monday 1/30/12.
I'll then draw a random winner and post the winner on Tuesday morning.
In case you didn't guess, I finally took the plunge and have opened my own Etsy store.
![]() |
| I've got some cute models. |
I'm really excited, and I hope you all like my shop. In fact, here's a little bit more about my shop:
Crafty Crow Couture is completely customizable shop for the whole family. You choose your desired colors and materials, while we take care of the rest. Our goal is to create unique items that are tailored to your taste for a reasonable cost.
Please contact us if you have any questions about our products, ability to customize, or if there is a product you might like that we do not have listed. As a completely customizable shop, we can create almost any custom order for you.
So since today is the grand opening, it means GIVEAWAY time! One lucky reader will be getting a $10 credit to the new shop.
![]() |
| My other cute model. |
1) First visit my shop and then in a comment let me know what you like the best. (REQUIRED)
2) Like my shop on facebook and leave me a comment on the wall and here to let me know. (1 Entry)
3) Share my shop page in your facebook feed and tag the shop in the link. Let me know in a comment (1 Entry)
4) Share my shop on your blog and let me know about it (link in comment). (2 Entries)
Deadline is 11pm, Monday 1/30/12.
I'll then draw a random winner and post the winner on Tuesday morning.
Wednesday, January 18, 2012
Worthwhile Wednesday- Dishcloths
This Christmas, I got some great books on Tunisian crocheting, also called afghan crocheting. Big thanks to Fran!!!
It gives you the look of knit, but with crocheting. Perfect for me, an avid crocheter.
To try it out I used some cotton yarn I got on sale awhile back. (have you noticed I'm all about using what I already have on hand?)
I loved it!!
First I just did the simple stitch.
Then I combined it with the purl stitch for this great honeycomb pattern.
Finally I tried the knit stitch, awesome!!
I made all dishcloths and washcloths to get used to the technique. Very simple and a great practice, plus more dishcloths which we needed.
To boot, these are stylish dishcloths that took very little time to make and cost a fraction of what even walmart charges. Since I got my yarn on sale, all in all my dishcloths maybe cost at most .50 cents a piece, for a much better look.
Next up is a bag for my bible study materials. I've been using a reusable grocery bag, and it's time to move up. I'm thinking I can make my bag for less than $3, using similar cotton yarn that I got at a fraction of the price.
Below is the pattern for the honeycomb cloth. If you need clarification on any of it, let me know.
Next up on my crocheting adventures: plarn. What's plarn? It's "yarn" made out of plastic grocery bags. The bad thing about plastic grocery bags is they aren't strong enough. Now, we use reusable bags to shop, but every once in awhile we get stuck with plastic bags and before we started using reusable bags we have a bunch leftover!
My goal is to use up my plastic bags, making stronger crocheted grocery bags. Plus if they get worn out or dirty, off to the recycling bin. A great way to reuse and then recycle later! (Even better, it gives us more reusable bags to take to the store without purchasing any!)
Look for some plarn adventures in the near future and happy dishcloth making!!
Honeycomb pattern dishcloth-
Chain 25, using h sized Tunisian hook and cotton yarn of your choice. Organic natural peaches and cream brand is always a favorite of mine!
Complete a foundation row forward- insert hook in second chain from hook. Yo, pull up lp. *insert hook in next chain. Yo, pull up lp. Awarding another stitch to hook. Repeat from * across. You will have 25 lps on your hook.
Foundation row return- yo, pull through 1 lp. *yo, pull through 2 lps. Repeat from * until 1 lp remains on hook.
Row 1- sk first vertical bar. *tps in next vertical bar, tss in next vertical bar. Repeat from * across, ending with tss.
Row 1 return- same as foundation return.
Row 2- sk first vertical bar. *tss in next st, tps in next stitch. (hint you have staggered stitches when compared to previous row) when two stitches remain, tss into next to last st and final st.
Row 2 return- same as foundation row return.
Repeat until desired length.
Final row- slip stitch across in normal stitches, Fasten off at the end. This gives the cloth the same look at the start and end.
This post linked with Frugal Days, Substainable Ways Wednesday.
It gives you the look of knit, but with crocheting. Perfect for me, an avid crocheter.
To try it out I used some cotton yarn I got on sale awhile back. (have you noticed I'm all about using what I already have on hand?)
I loved it!!
First I just did the simple stitch.
Then I combined it with the purl stitch for this great honeycomb pattern.
Finally I tried the knit stitch, awesome!!
![]() |
| Sorry for the shadow, I couldn't get it right. :( |
I made all dishcloths and washcloths to get used to the technique. Very simple and a great practice, plus more dishcloths which we needed.
To boot, these are stylish dishcloths that took very little time to make and cost a fraction of what even walmart charges. Since I got my yarn on sale, all in all my dishcloths maybe cost at most .50 cents a piece, for a much better look.
Next up is a bag for my bible study materials. I've been using a reusable grocery bag, and it's time to move up. I'm thinking I can make my bag for less than $3, using similar cotton yarn that I got at a fraction of the price.
Below is the pattern for the honeycomb cloth. If you need clarification on any of it, let me know.
Next up on my crocheting adventures: plarn. What's plarn? It's "yarn" made out of plastic grocery bags. The bad thing about plastic grocery bags is they aren't strong enough. Now, we use reusable bags to shop, but every once in awhile we get stuck with plastic bags and before we started using reusable bags we have a bunch leftover!
My goal is to use up my plastic bags, making stronger crocheted grocery bags. Plus if they get worn out or dirty, off to the recycling bin. A great way to reuse and then recycle later! (Even better, it gives us more reusable bags to take to the store without purchasing any!)
Look for some plarn adventures in the near future and happy dishcloth making!!
Honeycomb pattern dishcloth-
Chain 25, using h sized Tunisian hook and cotton yarn of your choice. Organic natural peaches and cream brand is always a favorite of mine!
Complete a foundation row forward- insert hook in second chain from hook. Yo, pull up lp. *insert hook in next chain. Yo, pull up lp. Awarding another stitch to hook. Repeat from * across. You will have 25 lps on your hook.
Foundation row return- yo, pull through 1 lp. *yo, pull through 2 lps. Repeat from * until 1 lp remains on hook.
Row 1- sk first vertical bar. *tps in next vertical bar, tss in next vertical bar. Repeat from * across, ending with tss.
Row 1 return- same as foundation return.
Row 2- sk first vertical bar. *tss in next st, tps in next stitch. (hint you have staggered stitches when compared to previous row) when two stitches remain, tss into next to last st and final st.
Row 2 return- same as foundation row return.
Repeat until desired length.
Final row- slip stitch across in normal stitches, Fasten off at the end. This gives the cloth the same look at the start and end.
This post linked with Frugal Days, Substainable Ways Wednesday.
Labels:
crafting,
DIY,
granola,
sustainable,
Wednesday,
worthwhile
Monday, November 7, 2011
Mom Monday
Not one to stifle creativity, I usually let Elizabeth create her own projects...
Which is why we have...
Glitter Cat and...
Picasso Witch!
Let's hope that creativity transfers into millions or at least a few nice wall hangings for Mommy.
Which is why we have...
Glitter Cat and...
Picasso Witch!
Let's hope that creativity transfers into millions or at least a few nice wall hangings for Mommy.
Wednesday, October 5, 2011
Let's hear it for fall!
It's time.
For homemade pumpkin spice syrup that is better than Starbucks.
For cheddar bread with chili.
For pumpkin cookies with milk.
For super cheesy Halloween decorations put up to make your kids smile.
For lots of paint, stickers, and construction paper...
all so some really spooktacular ghosts can hang on the fridge.
Happy Fall everyone!!
For homemade pumpkin spice syrup that is better than Starbucks.
For cheddar bread with chili.
For pumpkin cookies with milk.
For super cheesy Halloween decorations put up to make your kids smile.
For lots of paint, stickers, and construction paper...
all so some really spooktacular ghosts can hang on the fridge.
Happy Fall everyone!!
Friday, July 29, 2011
Addiction
Hi, my name is Kate and I have a problem...
I'm addicted to craft supplies.
Yarn is my best friend and worst enemy...
My family only enables me...
Or is it me starting something in them??? ;)
Anyone know a good support group? Maybe a CA- Crafters Anonymous?? ;)
![]() |
| I went to Micheal's dollar days sale. |
![]() |
| Our craft box after my 2ND trip to Micheal's. |
![]() |
| I keep telling myself, the etsy store will make up for this... |
![]() |
| Getting ready to paint. |
Or is it me starting something in them??? ;)
![]() |
| She likes to dribble...definitely modern art. Possibly some Pollack influence. |
Friday, July 8, 2011
Craft Day- Buzzing Bee!
Our last craft day, we made some bees and a hive.
We used an old milk carton and painted them.
Then I had an old container from strawberries that we colored to make their hive.
Elizabeth LOVES them. In Kindermusik there is a buzzy bee song, so we sang it while we played with them.
Lots of fun, Buzzzzz!
We used an old milk carton and painted them.
Then I had an old container from strawberries that we colored to make their hive.
Elizabeth LOVES them. In Kindermusik there is a buzzy bee song, so we sang it while we played with them.
Lots of fun, Buzzzzz!
Wednesday, June 22, 2011
Etsy Store- Name??
So I have slowly been working on stuff for the Etsy store. I've got a couple of hats, booties, and baby room sign.
I need WAY more than that though.
I thought I would be done already, but like everything it has taken a lot longer than expected.
This is mainly due to work- we're wrapping up this editing project I was selected for...I got bumped up to the higher paid grade so I've been pushing a little more on the edits than my crocheting. Whoops.
It will be over on the 30th...they might be selecting a few editors to continue though. It's great work and I enjoy it, so if you have a moment say a little prayer that I get selected. It's a good gig. But that's a total side note.
Instead, I wanted to talk about possible names for the shop.
I thought I should tie it to the blog name. It's limiting, but I probably need that and it helps people to remember the shop name- right??
So here's a few of my ideas. Let me know what you think or if you have an idea.
1. Crafty Crow Couture
2. Crow Crafts
3. Crow Kid Crafts
So number one is my favorite. The other two are sad rip offs of the first.
I'm afraid my imagination is a bit limited. But I'm the mom of two girls, I'm lucky I'm dressed, let alone typing. ;)
I need WAY more than that though.
I thought I would be done already, but like everything it has taken a lot longer than expected.
This is mainly due to work- we're wrapping up this editing project I was selected for...I got bumped up to the higher paid grade so I've been pushing a little more on the edits than my crocheting. Whoops.
It will be over on the 30th...they might be selecting a few editors to continue though. It's great work and I enjoy it, so if you have a moment say a little prayer that I get selected. It's a good gig. But that's a total side note.
Instead, I wanted to talk about possible names for the shop.
I thought I should tie it to the blog name. It's limiting, but I probably need that and it helps people to remember the shop name- right??
So here's a few of my ideas. Let me know what you think or if you have an idea.
1. Crafty Crow Couture
2. Crow Crafts
3. Crow Kid Crafts
So number one is my favorite. The other two are sad rip offs of the first.
I'm afraid my imagination is a bit limited. But I'm the mom of two girls, I'm lucky I'm dressed, let alone typing. ;)
Friday, June 10, 2011
Work break
So life seems to always catch up with me...
While I'm keeping up with work, I've got another big push to get some more data done.
There is also a push at the editing company I work for to get some stuff done by the end of the month.
Plus I just found out, I will be teaching this fall at our local University. Yay!
I've got two courses lined up. So guess what I get to do? Build course material, which if anyone knows the first time you have to do this for a course takes a LONG time.
Finally, I think I've finally decided to take the Etsy plunge. I'm going to start with crocheting. While I love my sewing machine and the embroidery it can do, I need some practice on things before I start selling.
In addition to work, I'm testing out patterns and figuring out price points. Add this to our already busy schedule and things are getting a little crazy.
So I'm probably going to be posting less, but I will try to keep up with things. Just don't be shocked if you don't see much from me or hear from me.
But once things get back to normal, I'm thinking free stuff! Though after I bounce some ideas off you all. ;)
While I'm keeping up with work, I've got another big push to get some more data done.
There is also a push at the editing company I work for to get some stuff done by the end of the month.
Plus I just found out, I will be teaching this fall at our local University. Yay!
I've got two courses lined up. So guess what I get to do? Build course material, which if anyone knows the first time you have to do this for a course takes a LONG time.
Finally, I think I've finally decided to take the Etsy plunge. I'm going to start with crocheting. While I love my sewing machine and the embroidery it can do, I need some practice on things before I start selling.
In addition to work, I'm testing out patterns and figuring out price points. Add this to our already busy schedule and things are getting a little crazy.
So I'm probably going to be posting less, but I will try to keep up with things. Just don't be shocked if you don't see much from me or hear from me.
But once things get back to normal, I'm thinking free stuff! Though after I bounce some ideas off you all. ;)
Craft Day Fun- Garden Fun!
Another fun craft day this week!!
We got some cute wooden critters at our local craft store.
Then we got out the paint.
That's right, I said paint. And yes, I do have a three year old.
Surprisingly, she did a great job!! No big messes either.
I had to help her some. It's hard to keep her totally focused in order finish.
But we managed and hopefully both Grammy and Melissa love their new garden decor.
I think Craft day is my favorite.
We got some cute wooden critters at our local craft store.
Then we got out the paint.
That's right, I said paint. And yes, I do have a three year old.
Surprisingly, she did a great job!! No big messes either.
![]() |
| Butterfly pick for Grammy's flowerpot. |
![]() |
| Bug pick for Aunt Melissa's flower pot. |
But we managed and hopefully both Grammy and Melissa love their new garden decor.
I think Craft day is my favorite.
Sunday, June 5, 2011
Craft Day- Caterpillar Crazy
Mondays are craft day at our house and with a three year old this can be quite an adventure.
I saved an old egg carton and paper towel roll this past week. This is what we did with it.
Wild animal binoculars and caterpillars.
Elizabeth LOVES the caterpillars...she took them to nap with her and ended up reading them a story.
The story??
The Very Hungry Caterpillar, of course!
I saved an old egg carton and paper towel roll this past week. This is what we did with it.
![]() |
| Ignore the lack of pants- we were about to go nap and who likes sleeping in pants? |
Wild animal binoculars and caterpillars.
Elizabeth LOVES the caterpillars...she took them to nap with her and ended up reading them a story.
The story??
The Very Hungry Caterpillar, of course!
Tuesday, May 31, 2011
Tada Tuesday- Embroidery!!
So I'm putting off, it's ok, tuesday, for another week. Instead I want to show off all the wonderful things my new sewing machine can do...it's terribly exciting, at least to me and blue haired old ladies.
I got started yesterday and once I started it was hard to stop.
What can I say, except I LOVE MY SEWING MACHINE!!
Though I do need to work on my construction of items (please do not look too closely at Evie's burp cloth- I did the top stitching wrong and didn't get my edges perfectly round) and placement in regards to fabric color (again do not look closely at Evie's burp cloth), I'm pretty happy with it.
Oh and I hope my friend doesn't read my blog anonymously...if she does she better act surprised on Saturday anyway. ;)
More to come soon!!
I got started yesterday and once I started it was hard to stop.
![]() |
| All the stuff I did together. |
![]() |
| Burp cloth for Evie and blanket for a friend's soon to be little girl. |
![]() |
| Another blanket and burp cloth- again for a friend whose baby shower is Saturday. |
![]() |
| Handkerchiefs for Mark- embroidered with a C in white- because he's "classy like that". |
![]() |
| Blanket that I'll be crocheting edges around for a friend. |
Though I do need to work on my construction of items (please do not look too closely at Evie's burp cloth- I did the top stitching wrong and didn't get my edges perfectly round) and placement in regards to fabric color (again do not look closely at Evie's burp cloth), I'm pretty happy with it.
Oh and I hope my friend doesn't read my blog anonymously...if she does she better act surprised on Saturday anyway. ;)
More to come soon!!
Wednesday, May 4, 2011
Crafty fun- New wipes and burp cloth
So last friday, I got to go over to my mom's and use her Bernina.
It runs like a dream. I wish I had one...but never mind that.
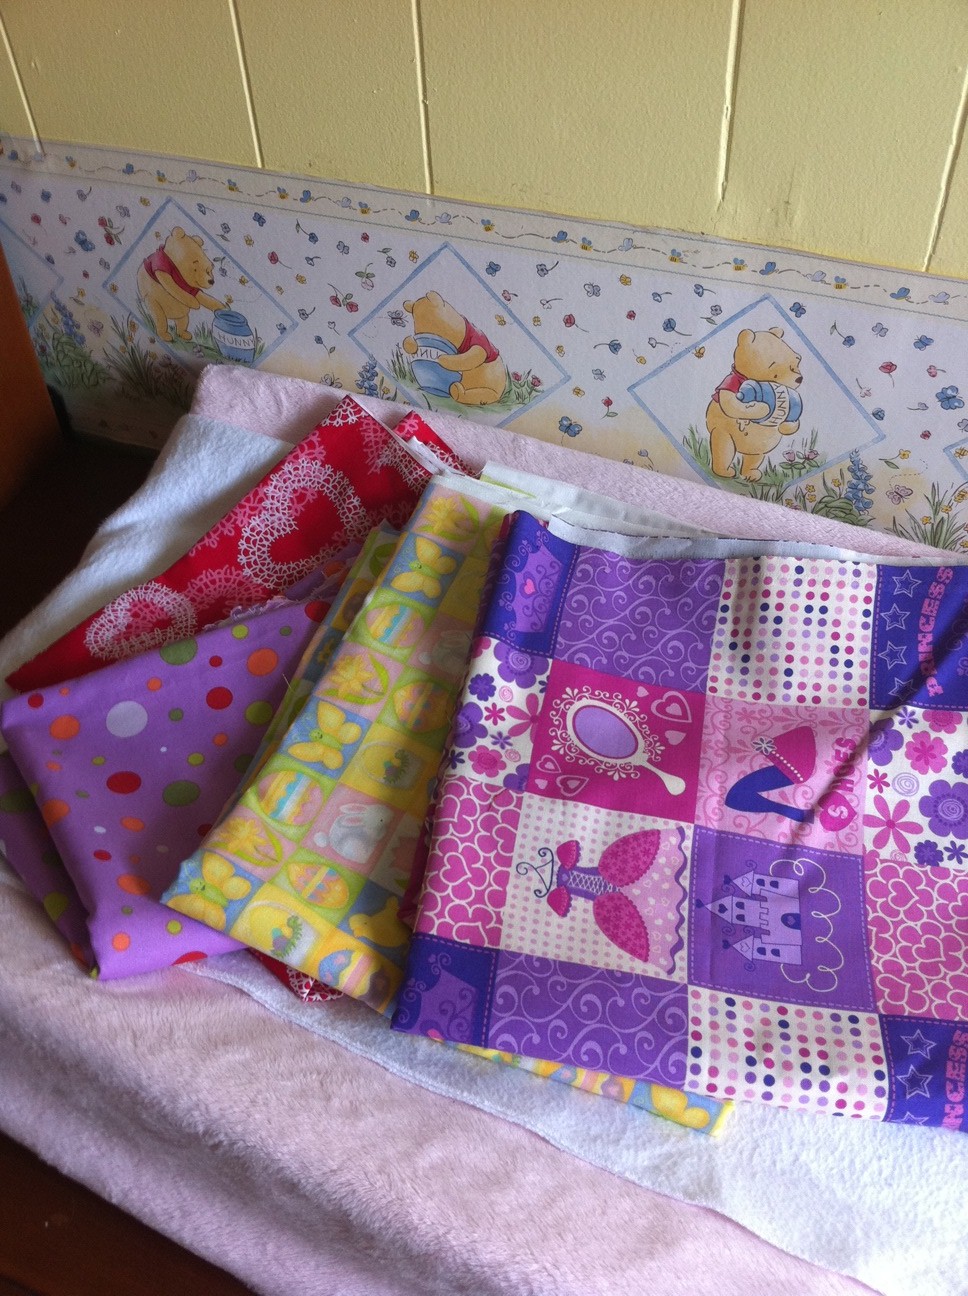
I got a bunch of wipes done. I used the serger on most and top stitched some of the others. You can see them below.
I also got a burp cloth done and the other two constructed. Right when I was getting ready to top stitch the other two...yep, the babies got up. So I have to wait to finish those.
I really love the burp cloths, they are nice and big. For some reason stores think babies have nice petite delicate spit ups.
Not my kids. Think drunken sailor meets the exorcist- that's how Evie spits up when she does.
That's why I love these. Really absorbent and covers your shirt. Oh and I know it's Easter fabric, but it's too cute!! Plus, if anyone says anything I'll just show them Evie's exorcist move.
It runs like a dream. I wish I had one...but never mind that.
I got a bunch of wipes done. I used the serger on most and top stitched some of the others. You can see them below.
I also got a burp cloth done and the other two constructed. Right when I was getting ready to top stitch the other two...yep, the babies got up. So I have to wait to finish those.
I really love the burp cloths, they are nice and big. For some reason stores think babies have nice petite delicate spit ups.
Not my kids. Think drunken sailor meets the exorcist- that's how Evie spits up when she does.
![]() |
| I chose the crocheted version. It was less gross than the normal one. |
That's why I love these. Really absorbent and covers your shirt. Oh and I know it's Easter fabric, but it's too cute!! Plus, if anyone says anything I'll just show them Evie's exorcist move.
Thursday, April 28, 2011
Getting Wiped Up
So way back when I was still pregnant, my church hosted a baby shower for us. One of the wonderful things we got was a HUGE box of wipes. Since I didn't have cloth wipes yet, and my hubby wasn't feeling cloth wipes we were thrilled.
Two months later and we have used them all. During those two months, I've been working on convincing Mark we should use cloth wipes...I mean we already cloth diaper.
I have finally succeeded. So I got out the sewing machine and some extra flannel blankets to make some. Now I've got an old sewing machine that really needs some work. It won't hold the tension without a few tricks and even then it can lose tension. Needless to say, a new sewing machine is on my birthday list.
SIDE NOTE- I really want a embroidery machine...even a simple one would be nice. Here's one I like...it's not the best machine since it only has a 4 x 4 hoop, but good for a beginner like me. Though if I were to be honest, having one size up on hoops would make me a giddy.
Anyway, first I tried to use a zig-zag stitch as an overlock stitch to make 1 ply wipes. My machine didn't like that...so then I tried sewing a two-ply wipe and using a top stitch on the outside to finish the edges. That worked.
Here's the finished product.
Tomorrow I'm making more. I'm going over to mom's to use her Bernina for new burp cloths and her serger for more wipes. Much easier than fighting with my machine. Oh and just in time too, as we were about to have to buy some more wipes...yay, for avoiding that. I'll post more pics of the outcome later. I have super cute fabric for my burp cloths.
The front part will be the cute fabric and the back will be terry cloth. Recycled towels to be exact. So not only am I totally a hippie for that, but it's not costing me anything to make these things (well, technically since I've had my fabric for awhile). YAY!
So if I make these and they end up nice, I might be convinced to make a few to giveaway. Because I like showing some love to you, even if I'm a novice at sewing. :)
Oh and up next in crafty land, more crocheting- because that is much easier for me! Anybody have any suggestions as to what they might like to see?
Two months later and we have used them all. During those two months, I've been working on convincing Mark we should use cloth wipes...I mean we already cloth diaper.
I have finally succeeded. So I got out the sewing machine and some extra flannel blankets to make some. Now I've got an old sewing machine that really needs some work. It won't hold the tension without a few tricks and even then it can lose tension. Needless to say, a new sewing machine is on my birthday list.
SIDE NOTE- I really want a embroidery machine...even a simple one would be nice. Here's one I like...it's not the best machine since it only has a 4 x 4 hoop, but good for a beginner like me. Though if I were to be honest, having one size up on hoops would make me a giddy.
Anyway, first I tried to use a zig-zag stitch as an overlock stitch to make 1 ply wipes. My machine didn't like that...so then I tried sewing a two-ply wipe and using a top stitch on the outside to finish the edges. That worked.
Here's the finished product.
| A few wipes made from old receiving blankets and homemade wipe solution. I'm making a wet storage case soon. |
| My favorite is on the top. So CUTE! |
So if I make these and they end up nice, I might be convinced to make a few to giveaway. Because I like showing some love to you, even if I'm a novice at sewing. :)
Oh and up next in crafty land, more crocheting- because that is much easier for me! Anybody have any suggestions as to what they might like to see?
Thursday, February 17, 2011
Pictures
So as promised I have a few pictures of my curtains. But a few ground rules before you look at them. ;)
1) Please realize I am a novice and these are simple curtains.
2) Do not look to closely as you may notice imperfections...and that is just not allowed.
3) Only positive comments, as I am pregnant and hungry all the time. I may channel my emotions into a case of ice cream, which would not be a good thing for my future waistline or the baby's sugar level. ;)
Enjoy!
1) Please realize I am a novice and these are simple curtains.
2) Do not look to closely as you may notice imperfections...and that is just not allowed.
3) Only positive comments, as I am pregnant and hungry all the time. I may channel my emotions into a case of ice cream, which would not be a good thing for my future waistline or the baby's sugar level. ;)
Enjoy!
| The lace panels I sewed, then had to "fix" to make them work. This is in the girls' bathroom. As you can see it is a very purple room, but we (Elizabeth and I) love it. |
| Kitchen curtain, yes, I do like pink. I have a pink kitchenaid mixer too...it matches my rose plates. Yes, I realize this borders on Grandma taste, but I don't care. I still love it. |
| Living room curtains. This is a huge bay window, and my cat Max, does sit on that little pillow in the window. He is that spoiled. |
| Wall hanging I hemmed. Again, yes, I like pink and roses. I guess you could say I have traditional taste...or English Grandma taste, either is fine with me. ;) |
Wednesday, February 16, 2011
Sewing fanatic
So I'm slowly becoming a sewing fanatic. I've finished my den curtains, the tie backs for all the rooms, finished the curtain for the kitchen door, and sewn and re-sewn the girls' bathroom curtains. I got new fabric for the bath, but didn't end up liking it when I was finished. So I took my original panels and started to think about how I could fix them. A little thinking, a pair of scissors, and some precise measurements...new curtains! Much better than the other fabric. So glad I tried it. I do want to add something to my bedroom curtains, but I'm having to think on it. I've tried several things and haven't like much...so I think some more thinking is necessary. Next I want to work on the pillows for our bed. I didn't do them, as I have no trim. Surprisingly, this bothers me...I guess I'm getting more adventurous with my sewing. I'd love to drop everything and start on the girls' dresses too. But I have a lot of cleaning ahead of me...being sick means other things didn't get done. But come next week, if I'm caught up on work that is, nothing is stopping me from getting a few dresses out for my sweeties...that is if one of those sweeties remains where she is... ;)
Sunday, February 13, 2011
Sewing funnies.
So after going to the banquet, we came home and got Elizabeth to bed. Then I got back to work on my sewing. I redid my bedroom curtains, but I'm still not super happy with them...and I don't know why. However, this latest incarnation is my favorite. So I'm going to finish the tie backs (these are already sewn, just need to add the rings to hook them) and see if they grow on me. I also noticed a problem with my living room curtains, so I added that to my list and fixed those right away. But again, I need to make the tie backs to finish them completely. I do like these, I'm very happy with how they turned out. I even finished our kitchen curtains (but no tension rod yet, so they are waiting to be hung).
So where's the funny you ask? Well, I was pretty concerned about sewing the lace panels for the girls' bath. I've never sewn lace, and I was afraid the machine might jam. It went super smooth. I was SO excited. I thought, finally one room completely done. Not waiting on something to finish it off...then I went to hang them. It seems I have two RIGHT panels. So I have a beautiful right side of the window and no left. I had to laugh...and even funnier. I had been given some panels earlier that I thought I had lost and were in our car. Mark raced outside to get them, both of us sure that a left panel would be among them...we've got FOUR right panels. It was too funny to be upset. I'm looking into a way to adjust the panels to make them work, but to be honest I think I'll just find some new fabric. I think it will be easier than trying to adjust them. I have to say though, I can make four right sides of windows look very nice!!
Saturday, February 12, 2011
More sewing
So in my recovery state what is on my agenda? Sewing of course! Well, actually I just finished doing a bunch of work that I had missed from being in the hospital, hence being on the computer. But I am on my way to do some more sewing. Today it will be re-fixing my bedroom curtains (I think I will like them better another way), hemming my lace curtains for the girls' bath, curtains for the kitchen, and pillows for our bedroom. I still haven't finished my den curtains, since Hobby Lobby didn't have a coupon last week. I know it sounds cheap, but I'm not paying that much for fabric. I can wait as they usually put out a coupon. Mom and I have also arranged for a diaper day. Tuesday next week, we'll be turning out the diapers. I'm excited as I was getting worried that we wouldn't get to it. I'm also about 10 rows short on my blanket for baby. I'm definitely going to push on that one. Still no progress on the bunting lately, but considering the weather...am I going to need it?? It's going to be in the 60's next week. Now that is weird. But maybe it will be cold enough for her to wear it...that is if I can finish it. Back to work! :)
Monday, February 7, 2011
Sewing Sunday
This Sunday was Super Bowl Sunday, but for me it was Sewing Sunday. I believe my sewing machine and I have finally bonded. That night while Mark watched the big game, I finished our bedroom curtains and hemmed a decorative wall hanging mom gave me. Mark was also able to hang all my curtains up that night too. Things are definitely moving along. Tomorrow Elizabeth and I are going to Hobby Lobby to get another yard of my den fabric so that I can finish those. I also got out my fabric for the living room and it looks like an easy fix. So hopefully (fingers crossed) all the rooms will be finished really soon, so that I can start on dresses! YAY!! I've also been crocheting as much as I can, but have only made progress on her blanket. I'll post pictures later of all my latest work. But if I can keep the pace up (and she stays comfy), I may get a lot of my projects done before baby's arrival. :)
Subscribe to:
Posts (Atom)